


You created a brand new Cloud Composer environment. Now what? A natural next-step in the CI/CD pipeline is to sync a Git repository to your environment.
The following example is based on the article Sync a GitHub repo to your GCP Composer (Airflow) DAGs folder, but applied to the context of Cloud Source Repositories.
Once started, your new environment has created a DAGs folder in a Cloud Storage bucket. Your goal is to sync the contents from your development DAGs folder in a Source Repository to the environment’s DAG folder in Cloud Storage.
-
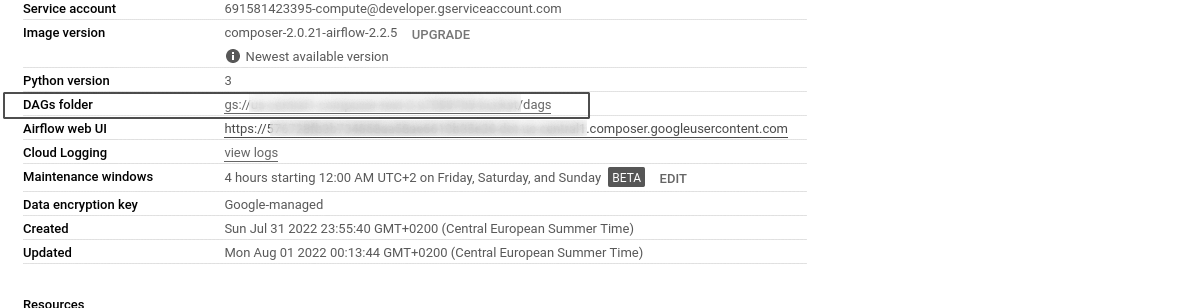
From your Composer environment, click on Environment Configuration and refer to the DAGs Folder location. Copy the link to the DAGs folder and save for later.
-
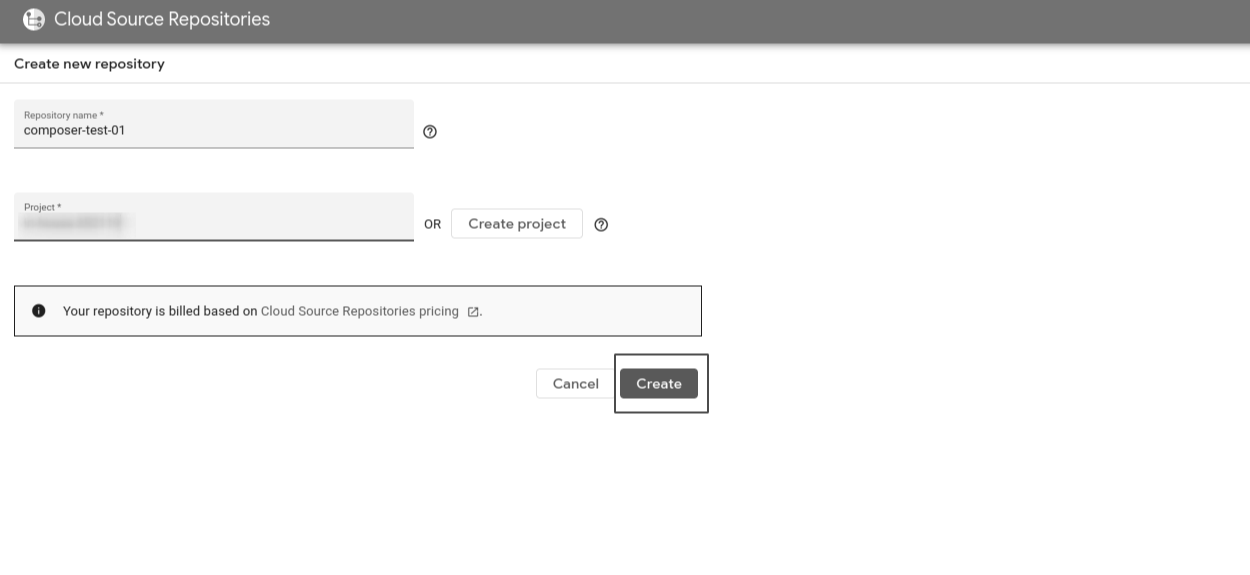
Go to Cloud Source Repositories. Create a new repository by clicking on Add repository.
-
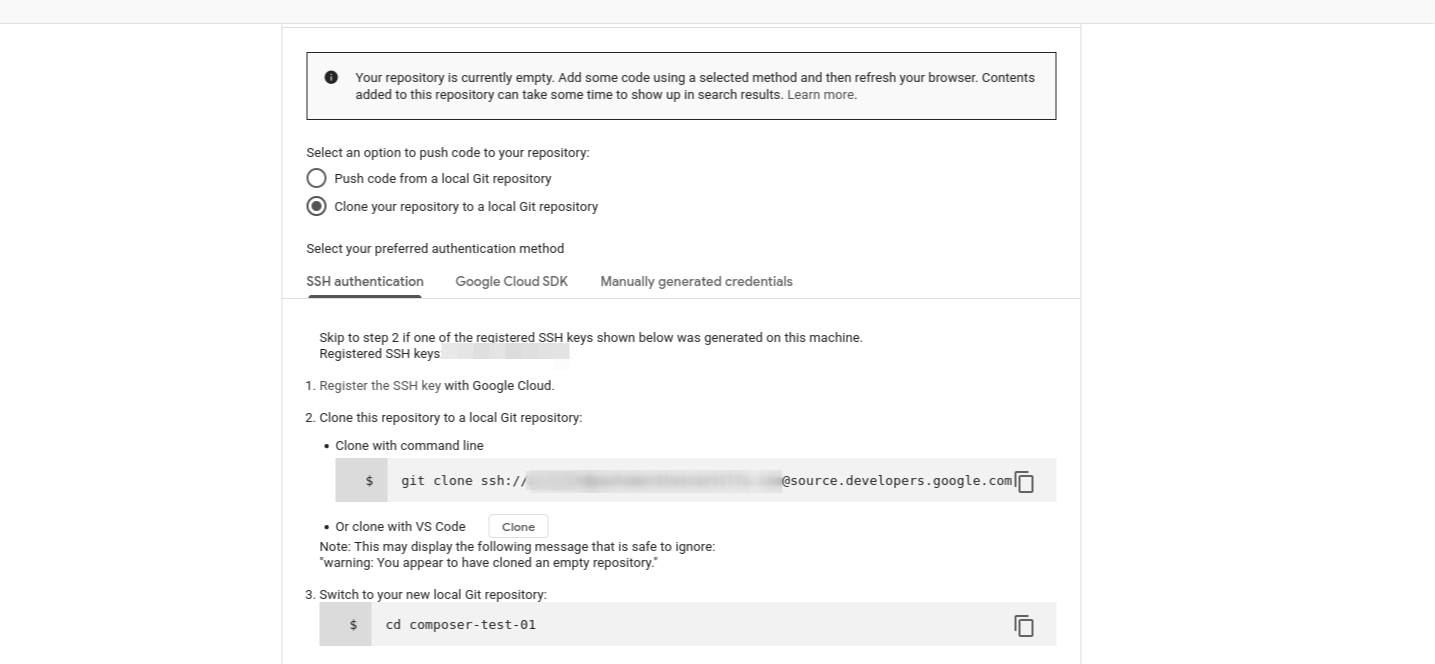
Using your preferred authentication method, clone the repository to a local git repository.
-
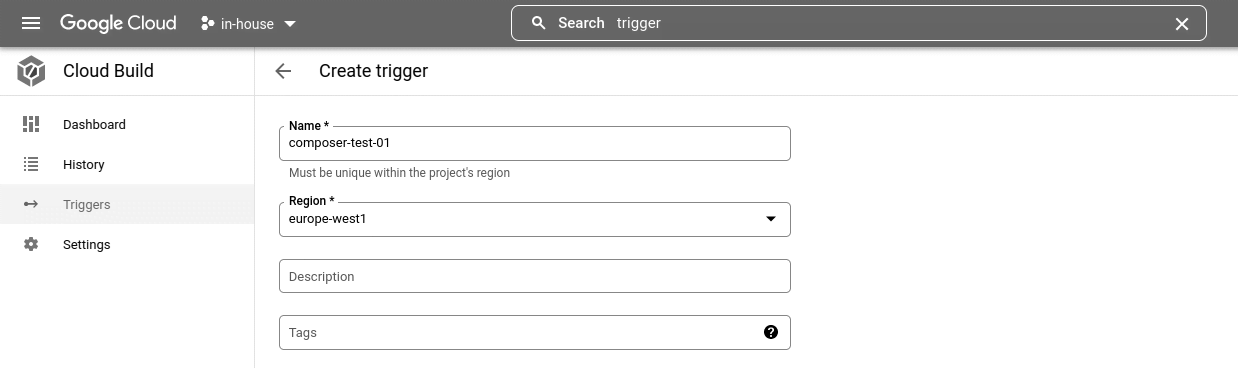
From GCP, go to Cloud Build. Click on Triggers > Create trigger +. Proceed to create a new trigger
-
Under event, make sure the trigger is set to “Push to a branch.” Moreover, select the repository created in step 2, and type
^master$under Branch.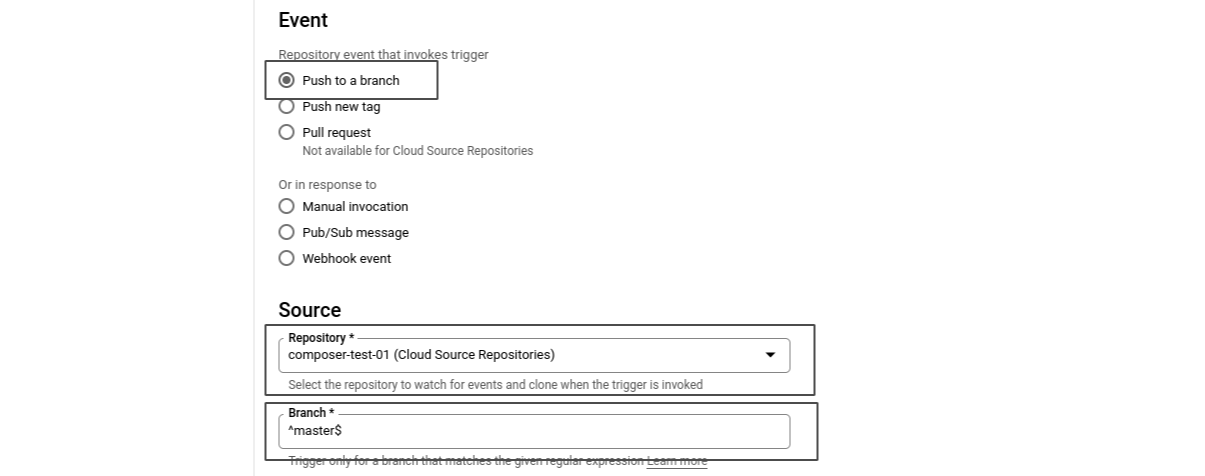
-
Under configuration, specify the path that will hold your yaml file, in this case
/cloudbuild/cloudbuild.yaml.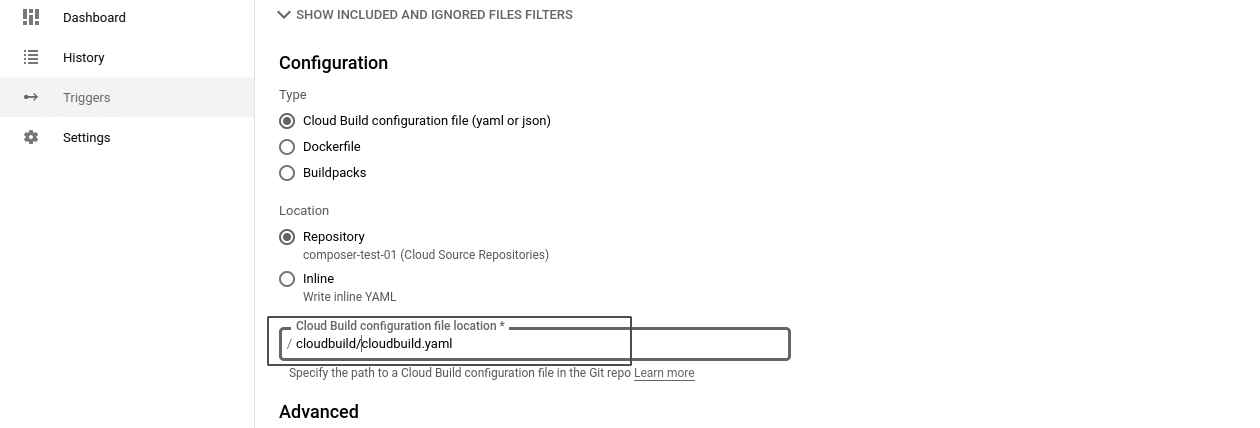
and finalize the trigger by clicking on Create.
-
Now go to the local repository. Create two folders, one named
cloudbuild, and another one nameddags. Undercloudbuild, create the fileclouldbuild.yamlcontaining the following content:steps: - name: gcr.io/cloud-builders/gsutil args: ['-m', 'rsync', '-r', '-c', '-d', './dags', 'gs://your-composer-bucket/dags']and replacing
gs://your-composer-bucket/dagsby your actual DAGs folder path from step 1. -
Under
dags, create a test DAG. For this example, create the filedag_test_01.pywith the following content:from airflow import DAG from airflow.operators.bash import BashOperator from datetime import datetime, timedelta yesterday = datetime.now() - timedelta(days=1) default_args = { 'owner': 'airflow', 'depends_on_past': False, 'start_date': yesterday, 'retries': 0 } dag = DAG('dag_test_01', default_args=default_args, schedule_interval= '0 0 * * *') t0 = BashOperator( task_id='say_hello', bash_command='echo "hello world"', dag=dag) t0 -
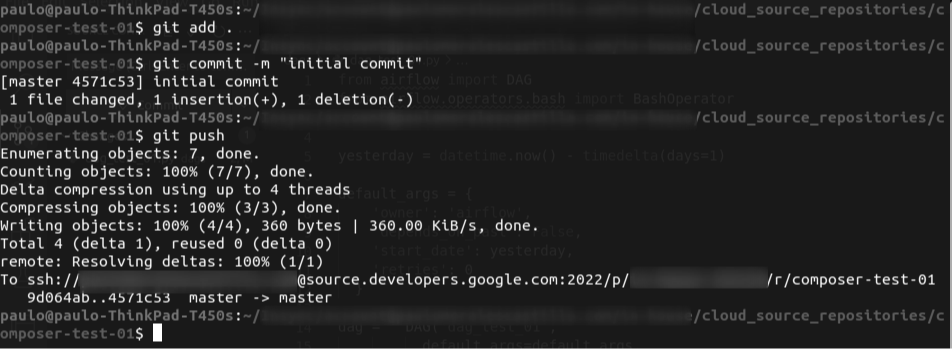
Commit your changes in your local repository and push them to the Source Repository.
-
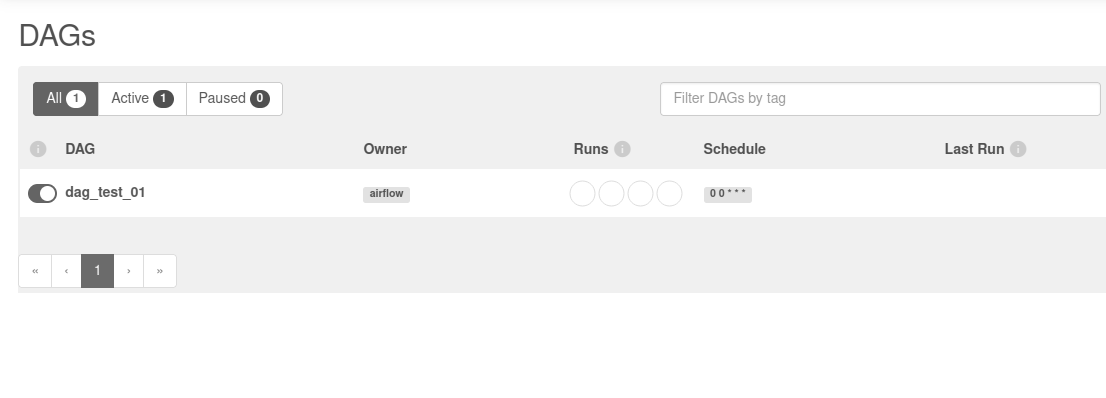
Finally, go back to your Composer environment. Click on Open Airflow UI. Now you should see the test DAG from step 8 on the Airflow DAG panel.
From now on, every commit pushed to the Source Repository will be reflected on your Cloud Composer environment. All related code is available on GitHub.


